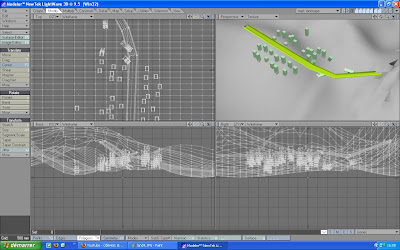
To start with i created a plane and divided 50 by 50 slices using the numerical tool.
The more slices there are the longer it takes to render but the smother the landscape.

I found an other technique for creating landscapes on youtube and decided to give it a try.
This involves using the morths and the airbrush tool.
http://www.youtube.com/watch?v=_TnpIxl7cws
I changed the intensity and the shape alot to create various shapes and at different hight. I manually created spikes for were i wanted the black hole to sit by selecting points and using the move tool to drag them around, mostly in the direction of the black hole.

To create the building a made a rectangular box and placed where i wanted it. I then used the boolean tool and boxes on an other layer to cut holes into the building to create the windows. I also used the same technique but with a a block that was slightly smaller than the building to hollow it out.

I then created the road as a point of reference for the city.
I created this by making a very long rectangle. I then used the bevel tool and the emboss tool to hollow it out and and the rim.
I have also been setting my objects a surface area along the way, this helps when texturing. If i set all the building with the same surface name, i can texture them all at once and this saves time.
I split the road once and selected on half. I rotated that half towards the black hole. Then split the half and rotated it again but more dramatically to try and show distortion.

I then copied my original building, and placed it somewhere else on a new layer.
Using the same technique i duplicated several buildings and merged the layers together to be able to duplicated more at one time. But because the environment is 3D, if i left the buildings as they were, mist would either be berried or floating, so i spent a while after readjusting the height of the building.
To create the black hole i created a capsule and hollowed it out by selecting the curved part and dragging inside it self with the move tool. I also deleted a good half of the capsule. Then i created a point by puling less and less polygons away from the main body. I deselected polygons the further i went away. I then selected the edge of the rim and increased its size to create what you see in the screen shot.
I textured everything in layout and also rendered and got my images out of it. Some of the textures had to be adjusted colour wise which i also did in layout.

I couldn't figure out originally how to use scanned material in my lightwave but i soon found an idea. I loaded my images into photoshop.
For the first image i used the news paper i scanned in. I lowered the opacity of the page and because the scan was a bad quality to begin with, once i had shrunk the image i did need to blur it. I simply blurred the edge i tiny bit.
I spent a while fiddling with the text though. The text is also from the same newspaper page.

I tried blurring the text, different layouts even a different colour but i eventually settled on having brighter letters and blurring the a bit.


For the second image i imported a tissue scan i had made. I set the tissue layer to overlay which left its texture on the land but not in the sky.

I imported a piece of texture from my egg box and motion blurred it the set it's layer to screen and lowered it opacity.
I then imported an other piece of texture.
i then lower the images brightness and increased the contrast 3 times to get the effect i wanted. I then set it's layer to screen, which would hid it's darker parts and leave the light ones.

I used the same techniques on all the other images.

The difference here is on the egg box texture.
On the end close to the black hole i selected an area, applied feather to the selection then applied a radial blur to get the effect you see here.
I also applied the same effect on the stars around the black hole to show it's rotation.

Because te rendering messed up on some of the images, i fixed this on this image with the clone tool.


to finish, i imported everything into final cut pro and applied sound.


0 comments:
Post a Comment